|
<< Click to Display Table of Contents >> How to Customize the Forms List |
  
|
|
<< Click to Display Table of Contents >> How to Customize the Forms List |
|
Form setup
Do you need a way to customize your forms list based on the type of sale you are doing? What about setting certain forms to only show up when you have a specific lien holder? What about out of state sales?
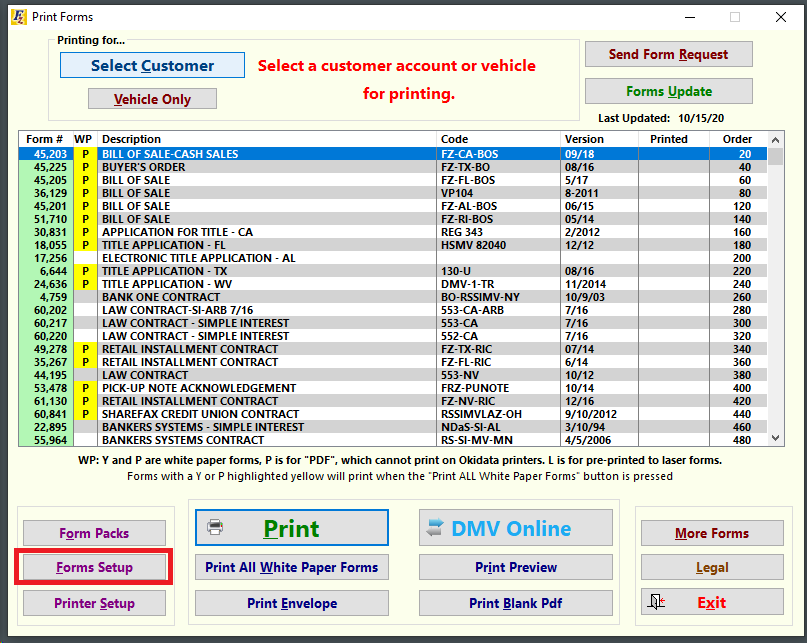
Frazer makes it easy for you to tailor your forms list to your exact needs. We will start by opening “Print Forms” inside your Frazer program. From there, click on the purple “Forms Setup” button in the bottom left of the forms printing screen.
Once you’ve entered the “Forms Setup” menu, ensure you are seeing all of the forms available to you by reviewing the radio buttons for “What is Displayed” in the top right of the menu.
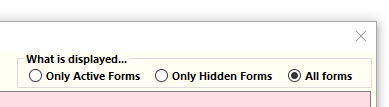
Select “All forms” to see all of the forms currently available in your forms library. From there select one of the multi-colored tabs to sort your list by “Form Number”, “Description”, “Form Code”, or “Relative Order”.
To change a form's settings, simply double-click on it or select the form and click “Change selected Form Settings” at the bottom of the menu.
For “White Paper” forms:
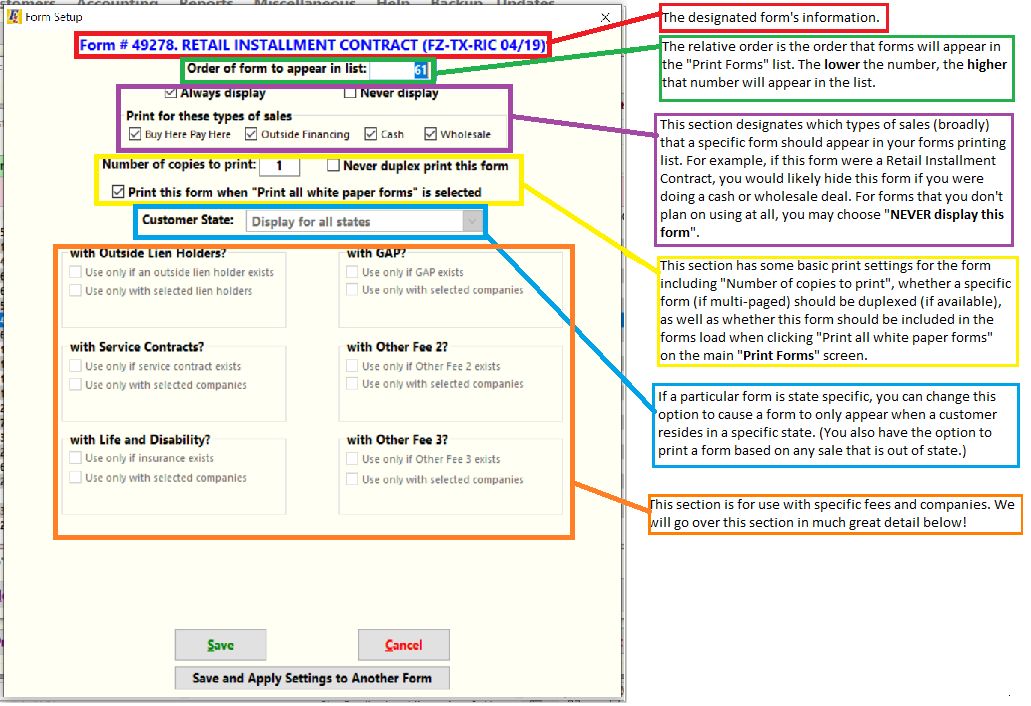
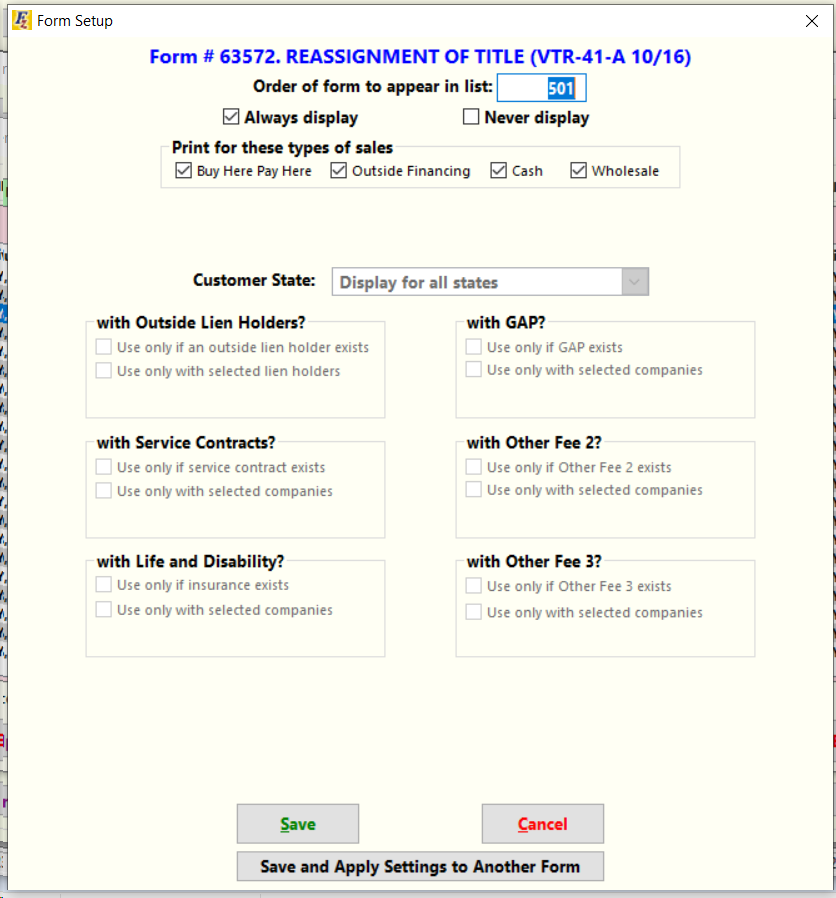
Let’s talk about the orange and blue section above! To enable this section in the forms printing menu make sure that both check boxes for “Always display this form” and “NEVER display this form” are *UN-CHECKED*.
Once you’ve gotten both boxes unchecked you’ll see all of these features light up. From here you can set a specific state option. Options include displaying a form for “In-state sales only”, “out of state sales only”, and for a specific state only. (Example: If you have a specific neighboring state’s title application in your forms library.)
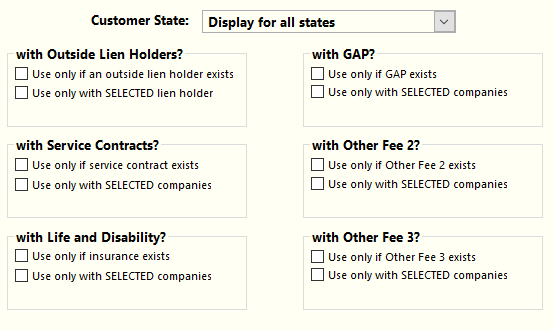
Below that, you will notice options to display forms specific fee and deal structure cases. Options available include when there is a lien holder present, when there is a service contract, life and/or disability insurance, GAP, Optional sales fee 2, and finally Optional sales fee 3.
The first check box for any option is fairly straight forward as that will enable a form to appear whenever that type of fee exists on a sale. The second check box allows you to add an even bigger specification to a form as you can select to only have the form appear for a specific vendor. Checking the second check box and then clicking the “Click to select company(s)” will bring up a box that will allow you to set a form to only appear when a certain fee and vendor are selected on a deal.
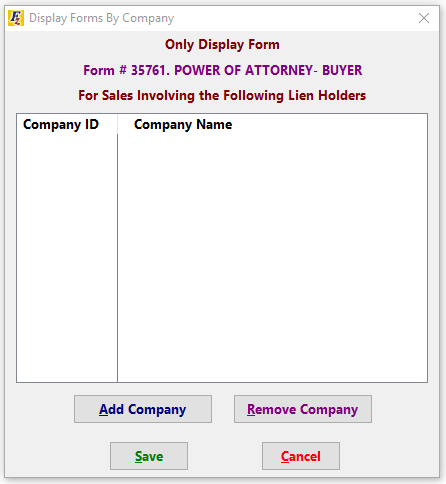
Clicking on “Add Company” will bring up your Lien Holder File and Vendor Files respectively and allow you to create a list of the vendors for which a specific form should appear.
Note: If you need the form to show up every time there’s an outside lien holder or specific fee, then you only need to check the first box. Any new vendors added will not affect a form appearing in the list.
I have a bunch of forms that will need the same exact settings. Will I have to do this with each form?
Frazer makes it very easy to transfer settings from one form to another (or many forms). To start, click the “Save and Apply These Settings to Another Form” button at the bottom of the Form Usage (Setup) screen. This will bring up a special window where you can select the forms to apply settings to.
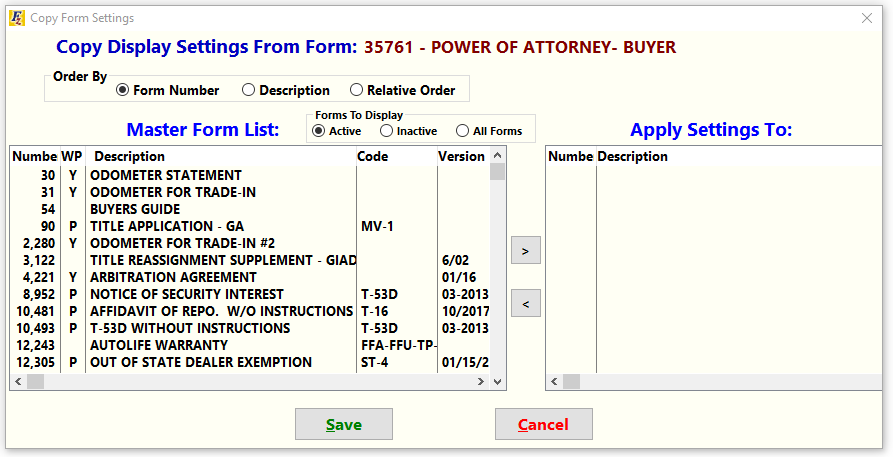
On the left is your Master Form List. You can choose to sort this information by “Form Number”, “Description”, or “Relative Order”. You can also choose to display “Active Forms”, “Inactive Forms”, or “All Forms”.
To the right is your list of forms that you would like to apply settings to. To move a form from one column to the other, simply highlight it and click the respective arrow for the direction you would like to send the form. Once your “Apply Settings to” column is in order, press Save. This will apply all of the settings from the initial Form Setup window to the forms selected.
For Okidata Dot Matrix (Pre-Printed) forms:
There isn't a ton of difference between the setup for pre-printed forms and white paper forms. When opening the form settings screen for a pre-printed form you'll notice that only the settings pertaining to white paper disappear.
As far as the rest of the functionality of this screen including transferring settings to other forms, everything works exactly the same.
For a look at Form Packs (a different way to tailor your forms menu) Click Here!