|
<< Click to Display Table of Contents >> Using DocuSign in Frazer |
  
|
|
<< Click to Display Table of Contents >> Using DocuSign in Frazer |
|
Please note, that some states / entities do not always recognize documents signed remotely as legally binding. See here for more information. Frazer also recommends (if you are unsure) reaching out to your local Independent Automobile Dealer Associations or other dealer organizations for more details.
This Help Manual article is more for information than for endorsement of an outside product.
Frazer’s support staff is often asked about integrations regarding digital document delivery. Unfortunately, as of right now, Frazer does not have any direct integrations with such a platform. However, in talking with our dealers and in doing some research, Frazer has found a workaround that may work for you. This article should help you setup DocuSign so that their platform can receive Frazer documents. Once received, you can set up the signature areas, as well as send these documents securely to the customer.
The first step to using DocuSign in Frazer, is to sign up to use DocuSign. According to the website (http://www.docusign.com), DocuSign offers a 30 day free trial. That is the perfect amount of time to find out if DocuSign will work for you!
Once signed up with DocuSign, you will need to install the DocuSign print driver. I was able to find a “downloads” page by logging into the DocuSign portal, and clicking on the “Need help getting started?” button. (Scroll to the bottom of the page, and look in the center.)

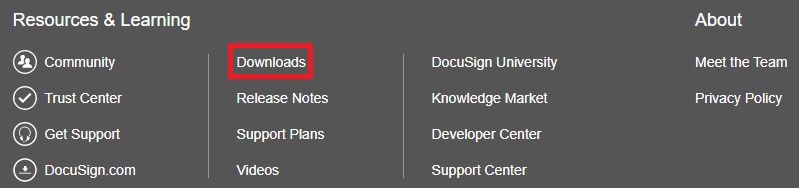
DocuSign offers a lot of great resources in regards to customizing the experience for both you and your customers. For the purposes of this article, we’ll focus on the nitty-gritty of getting a document sent. Once on the DocuSign support page, scroll to the bottom of the page and look for “Downloads” in the links.
Look for “Downloads.”
DocuSign offers a wide array of apps and programs for various devices. In-house we’ve used the online (browser) portal. Scroll down until you find the “Print Drivers.” Select the .exe print driver that matches your version of Windows. (If you are unsure whether your version of Windows is 32 or 64 bit, please note, that a vast majority of Windows versions are 64 bit. You can double check this by searching “System Information” at the bottom of Windows, and looking for “System Type.”)

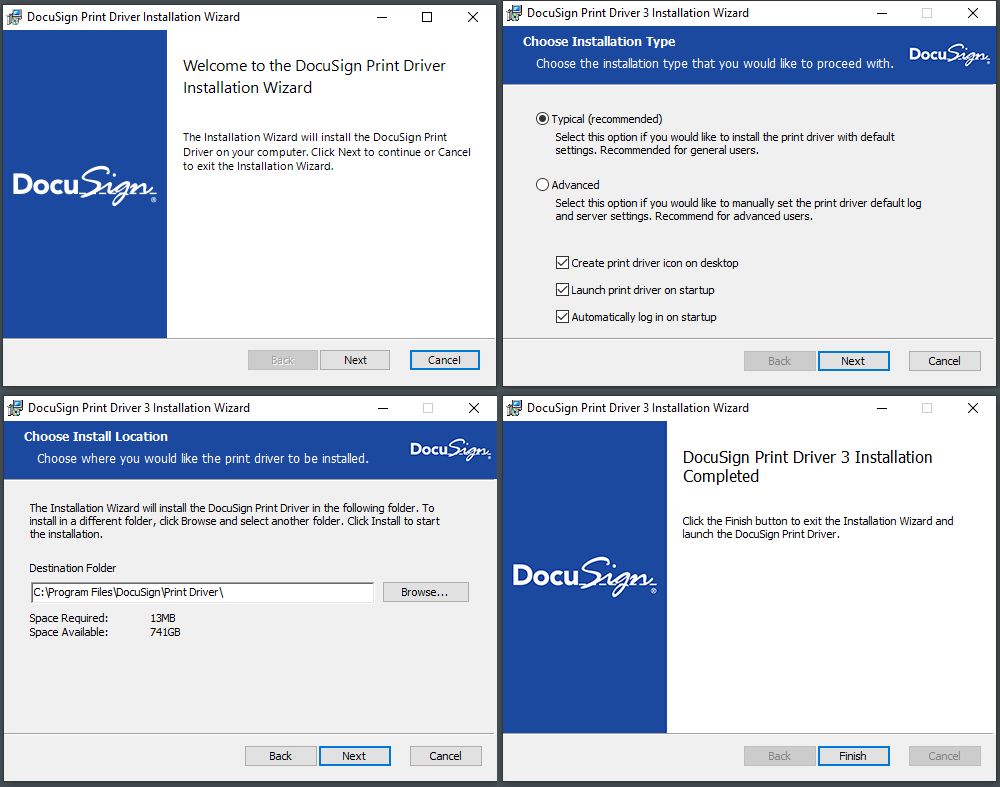
Once downloaded, follow the prompts to install the DocuSign print driver.
With the DocuSign print driver installed, you are now ready to connect Frazer and DocuSign.
Open Frazer, and navigate to Miscellaneous > 0 – Printer Setup, and look for the “White Paper Forms” printer.
Click on “Select or Change Printer” and choose the “Print to DocuSign” option. Also, make sure to check the box for "duplex" so that Frazer creates one document per form.
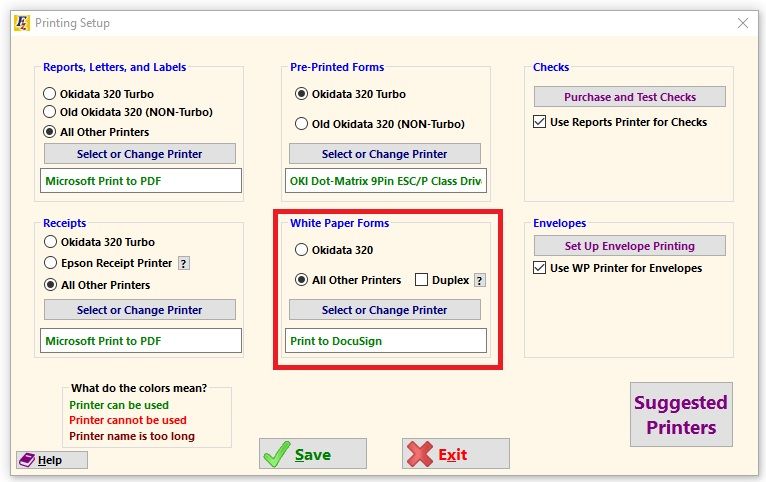
Special note: With this option enabled, any forms “printed” will be sent to DocuSign. Frazer recommends setting up a form pack with any documents you want sent with DocuSign.
The order of operations when printing a deal would be:
1.Set your normal printer in printer setup, and print the forms that don’t require a signature.
2.Change to the DocuSign print driver, select your DocuSign form pack, and “print” the rest of your paperwork.
With the DocuSign driver selected in Frazer’s printer setup, open “Print Forms.” From here, simply select the form you would like to send to DocuSign and select “Print” at the bottom.
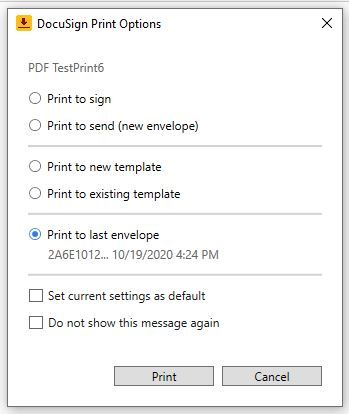
This will cause the DocuSign Print options to pop-up.
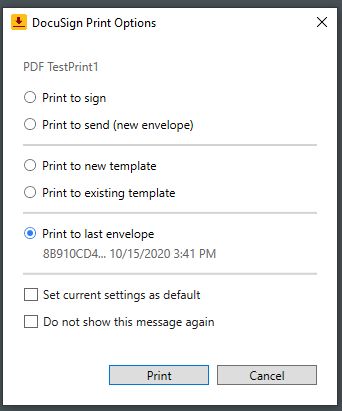
DocuSign offers a couple options from here for how you want the document treated. We will focus on the first two:
•Print to sign – Creates a document that YOU, the dealer, needs to sign to send to others.
•Print to send (new envelope) – Creates a document that will include other people’s signatures.
For your purpose, of sending a document to a customer, we will select “Print to send.”
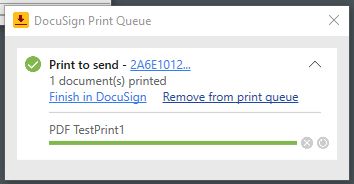
You will then have the option to “Finish in DocuSign” or “Remove from print queue.” “Finish”, will pull open the DocuSign webportal, whereas “Remove” will remove this document from queue and do nothing. If you are only sending one document to your customer for signature, click “Finish.”
This will open the DocuSign webpage.
If you are sending multiple documents continue reading. If you are sending only a single document, skip ahead to "Preparing the Document."
Sending Multiple Documents
At this point you may add additional documents to your “envelope” by repeating the process in Frazer of printing, and selecting “Print to last envelope” on the DocuSign print dialogue. (Don’t press finish on the subsequent queue until all documents are added.)
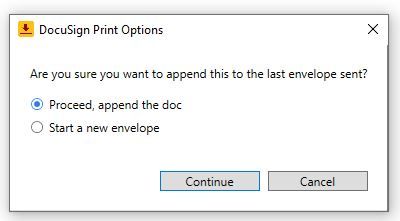
Select “proceed, append the doc.”
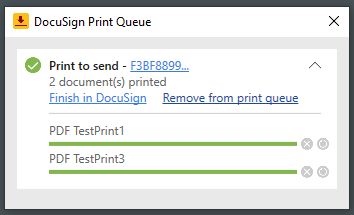
Once you’ve added all of your documents and see them listed in the DocuSign queue, select “Finish in DocuSign.”
Once you have selected “Finish” on the DocuSign print queue, you will be directed to the online portal.
From this page you will be able to “Add Recipients.” (These are the people you will have sign the document(s) sent.)
Include any dealership employees that may need to sign in this section as well.
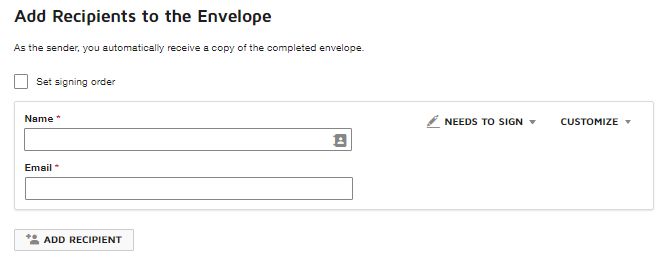
Take note that clicking on the text “needs to sign” will give you the option to also add recipients that are receiving a copy of the document but do not require a signature.
You may also add a message.

This page also provides use of DocuSign’s more advanced options that are available. Click “Next.”
Once you’ve clicked “Next”, you will have the ability to prep your document for signature. Sample Fields are on the left-hand side of the screen.
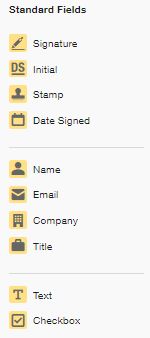
You will use these fields to prompt for information from the recipient.
Most documents that you will send to your customers will probably only require “signatures” or “initials,” though there may be cases to prompt for typed name, company, or dates.
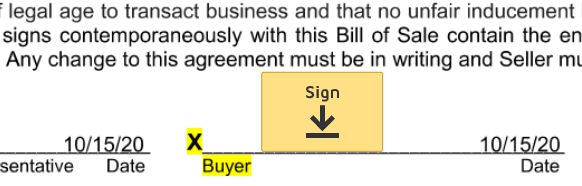
To add a signature line, simply find the appropriate line on your prepared form, click on “Signature”, and then drag the signature box where it should go.
Clicking “send” will send your prepared documents to your customer. Your customer will receive an email prompting them to respond to the paperwork.
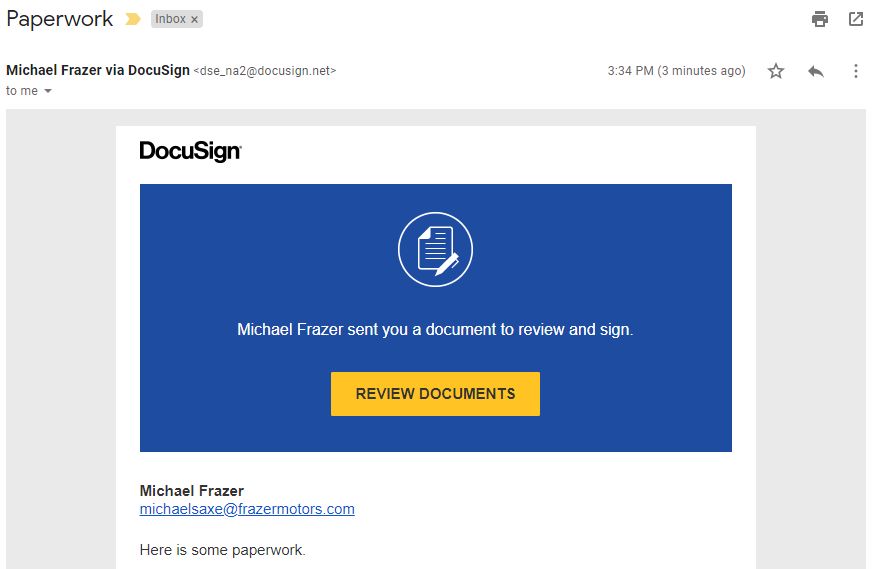
Clicking “review documents” will guide your customer through the signing process. Once the customer has successfully signed all of the documents you will receive a notification in the “sent” box on the DocuSign Portal.

Once open, you may download the packet or print it.
Editor’s note:
Hopefully this guide will provide a helpful how-to for the initial setup. At this document’s writing I had no experience with DocuSign and was able to fully setup the print driver and successfully send myself a document to sign with fairly minimal trial and error.
DocuSign also offers a lot of great features, and Frazer strongly suggests checking out their tutorials, found here: https://support.docusign.com/en/guides/dses-user-guide