|
<< Click to Display Table of Contents >> Epson Printing |
  
|
|
<< Click to Display Table of Contents >> Epson Printing |
|
Welcome to the Epson Dot Matrix printer page! In this article you will learn about the different models of printers that Frazer is compatible with as well as step-by-step instructions for setting your printer up to work with Frazer.
Models that Frazer Supports:
•LQ-590II
•LX-350
•FX-890II
•FX-2190
Getting to know your Epson Printer:

These photos are provided as a means to get to know your new printer. As we work our way through setting things up, photos of the specific item mentioned will be attached to the setup.
Unboxing and initial setup:
Most of the time your printer will install via plug-and-play, simply plug the printer in, connect the USB and Windows will take care of the rest. For more information about installing a printer / printing a Windows test page, click here.
Note: If you discover issues with your printer working from Frazer, simply verify that the driver used for the printer is the "Epson LQ 590III ESC/P2" (or your specific model). If the driver is not listed as the model of your printer, simply give Frazer's tech support a call at 888-963-5369 and a customer service representative will be happy to help you get your printer setup with the correct drivers.
Frazer Setup
With the printer installed, and capable of printing a Windows test page, let's set the printer up to work with Frazer.
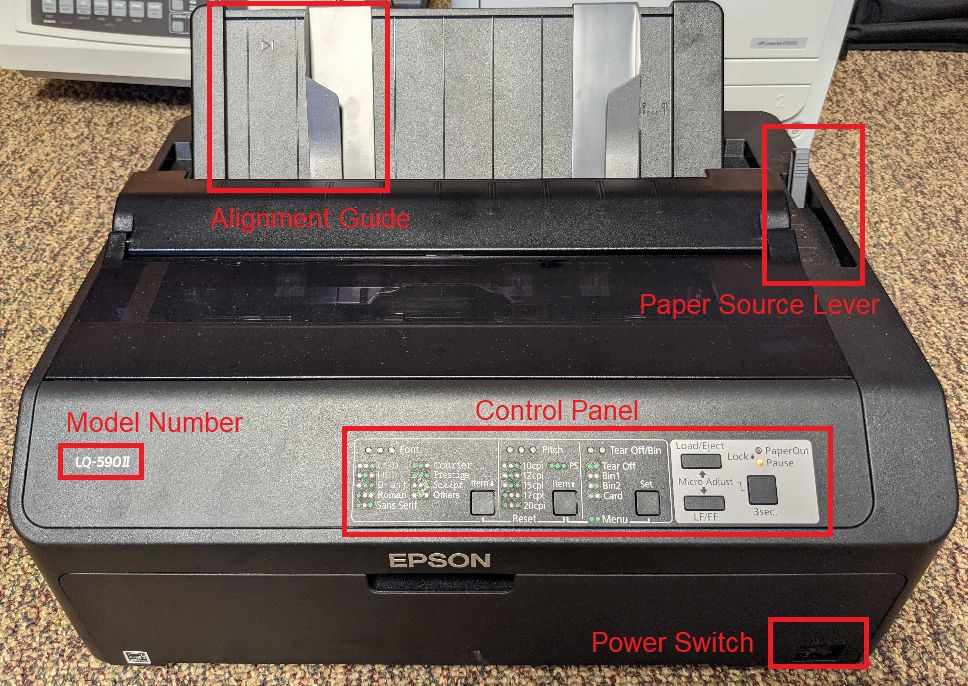
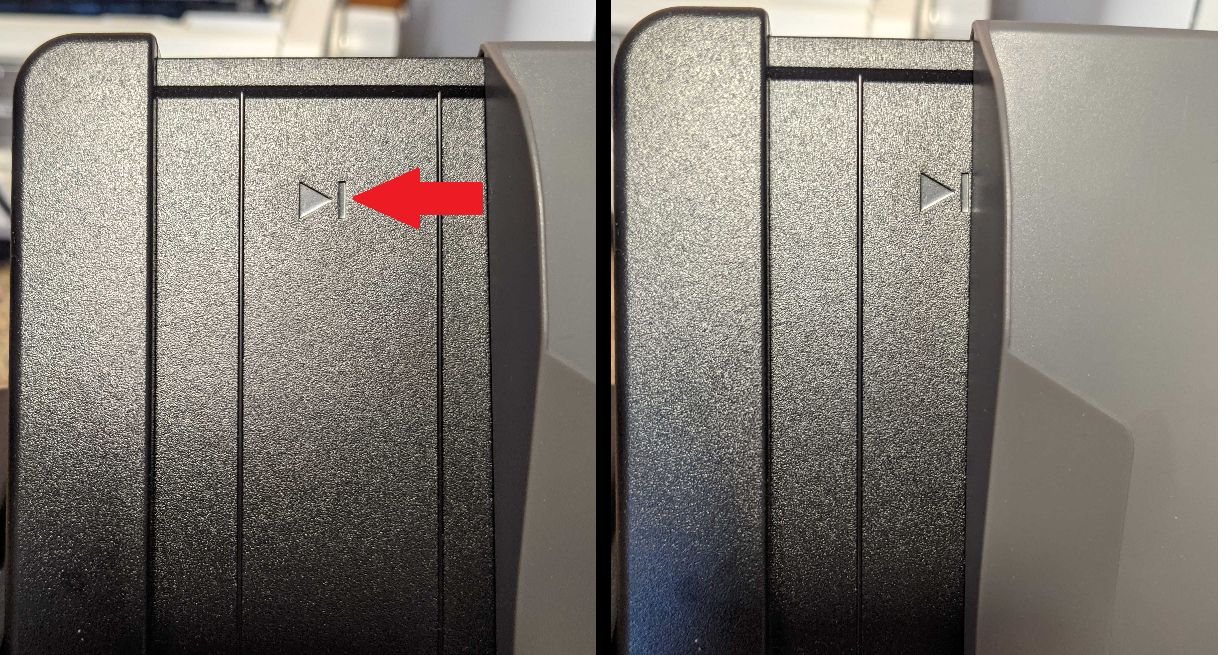
Step 1: On the top right is the paper feed selection lever. You will want to move the tray selector to the back-most position.
Step 2: Move the left-hand paper guide in line with the mark on the paper feed tray.
Please note: There is more wiggle room in the paper feed tray than on the OKI and you may need to adjust both the left-hand guide and/or shift the paper feed tray to adjust the alignment left or right. The position of the right-hand guide is only important in that it should be used to support the form and keep it feeding in straight.
Step 3: Load a blank sheet of paper.
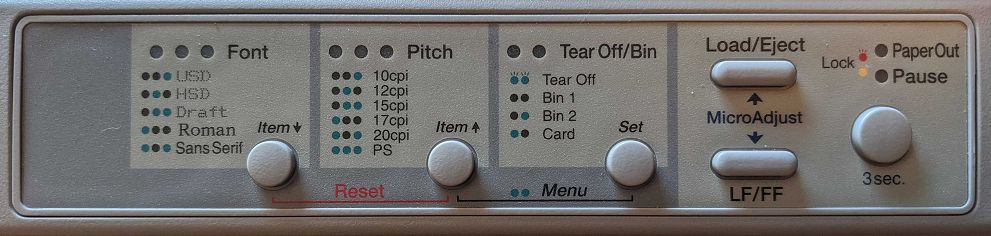
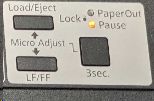
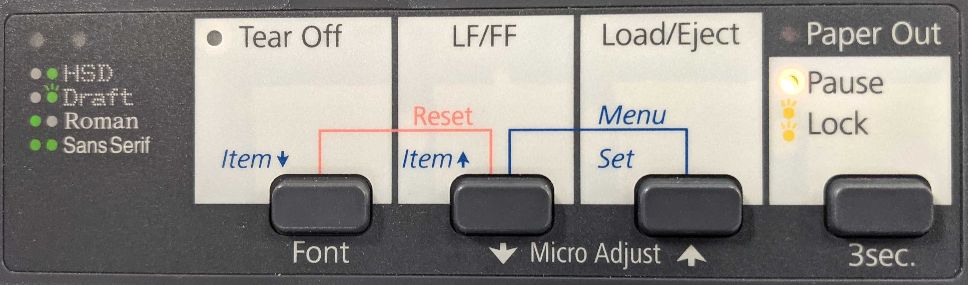
The “Pause” light should be off, if it isn’t press and release the “3 Sec” button to turn it off.
Step 4: To set the top of form, press and hold the “3 Sec” button until the printer beeps. The “Pause” light should continuously blink. Press/hold the “LF/FF” button. The form will walk down similar to that of the Okidata (if you've used one in the past). Continue to hold the button until the printer beeps again. Press and release the “3 sec” button. The pause light will stop blinking.
Step 5: If your model of printer has a Pitch setting, set this to 10cpi.
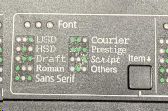
Step 6: Any mono-space font should work, Courier is what's typically used on Okidatas. Non mono-space fonts (ex. "Others" on the LQ-590II) will prevent proper alignment.
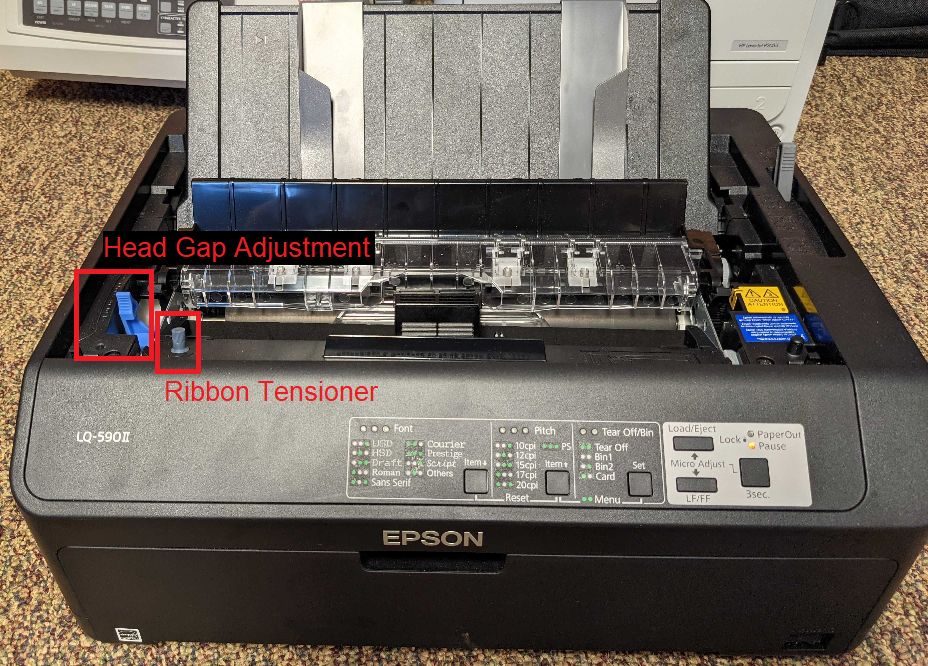
Step 7: Under the main top cover on the left side is a head gap control lever. You can set that to a 4 or 5, keeping in mind that some good old fashioned trial and error will be in play to determine the best print quality.

Getting to know your particular model (Click on your model below to get more information about your model of printer)
Please note that this help manual entry DOES NOT explain how to change settings. By default, all printers listed should work for Frazer right out of the box. The following charts (linked) are for reference or in the event that someone has changed the printer's default settings.
Models supported:
Control Panel
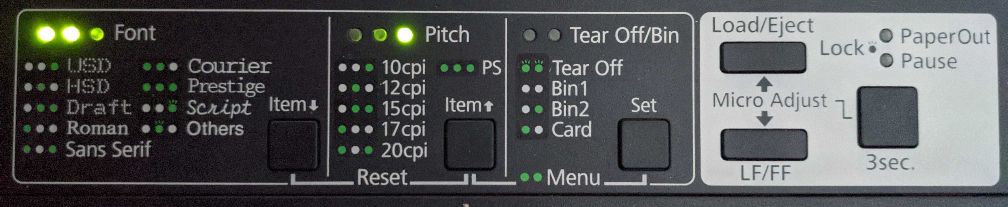
Control Panel
Control Panel

Control Panel