|
<< Click to Display Table of Contents >> LPT Ports and Windows 10 |
  
|
|
<< Click to Display Table of Contents >> LPT Ports and Windows 10 |
|
Setting up a printer to use an LPT port in Windows 10.
In Microsoft’s great wisdom, with the release of Windows 10, they did away with the default ability to use LPT ports for legacy printing devices.
Fear not there is a way to turn it back on! This guide will lead you through changing the setting so that you may use your legacy device.
The first step in our journey will take us to the Windows Device manager. To get there click in the search box adjacent to the Windows icon in the bottom left hand corner. Type in “Device Manager.”
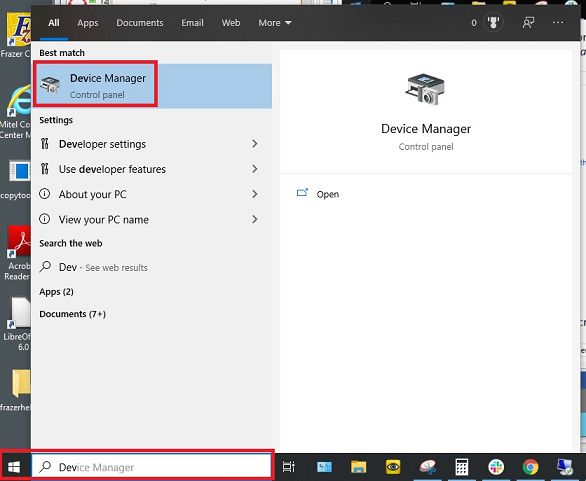
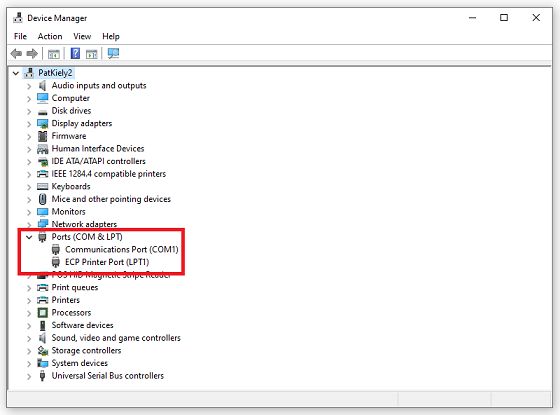
As you type, Windows should be searching for a program matching your search. Once you see "Device Manager", click on the icon. With the "Device Manager" open, look for “Ports (COM & LPT)” in the list of different device types.
Once found, expand the selection:
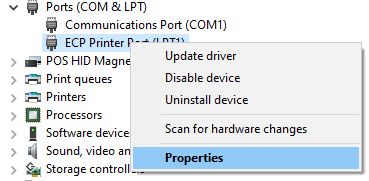
Right click on “ECP Printer Port (LPT1)” and choose “Properties.”
Navigate to the “Port Settings” tab and check the box to “Enable legacy Plug and Play detection.”
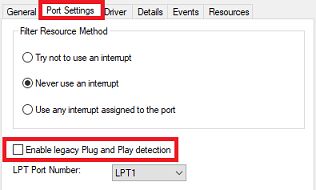
Saving this setting change MAY prompt you to reboot your computer. DO NOT DO THIS. Rebooting will turn this setting off. Frazer is not suggesting that your computer should stay on forever with no reboots. Basically Frazer just wants you, the dealer, to know that this setting may be reset every time a computer reboot is done. Why Microsoft prompts you to reboot after changing a setting that is reset after a reboot is a philosophical question I’m not prepared to answer today.
From here, you should be set to navigate to “Devices and Printers” to print a test page. If the test page works, you should be all set.