|
<< Click to Display Table of Contents >> Installing and Setting up the Epson T20II |
  
|
|
<< Click to Display Table of Contents >> Installing and Setting up the Epson T20II |
|
Installing and Setting up the Epson TM-T20II
First and Foremost, if you haven't done so yet, run a Version Update in Frazer.
For instructions on updating Frazer to its latest version, click here.
Now, for the new Epson TM-T20II Receipt Printer.
The contents of the printer’s box include the printer itself, a printer USB cable, a power cable, user instructions, and an installation CD.
First, plug the power cable and usb cable into the back of the printer.
Then, plug the power cable into a wall outlet, and the other end of the usb cable into a usb port on the computer.
Turn your receipt printer on and insert the installation CD into your computer’s CD drive.
The installation software should run automatically and you will see this screen.
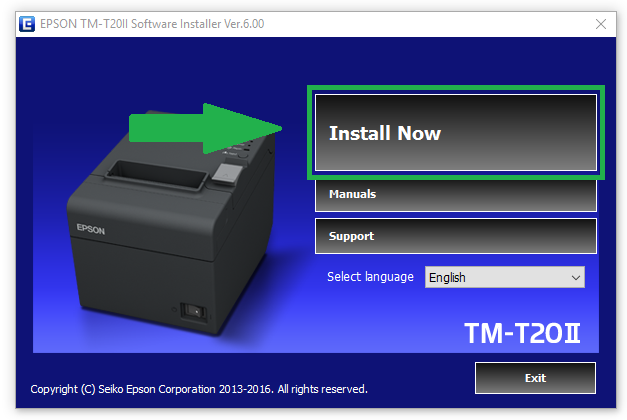
Click “Install Now” to begin the installation process.
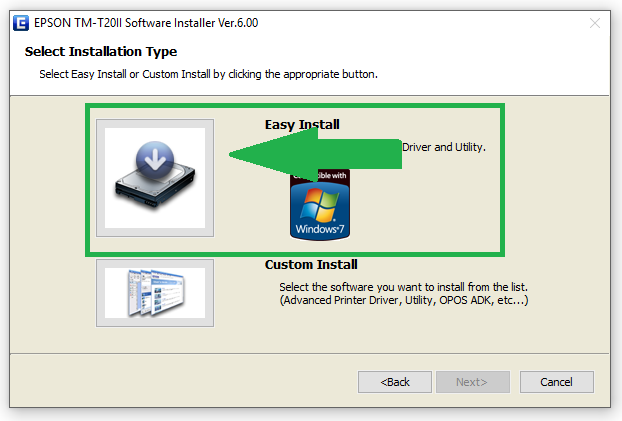
Click “Easy Install” and then Click “Next” to continue.
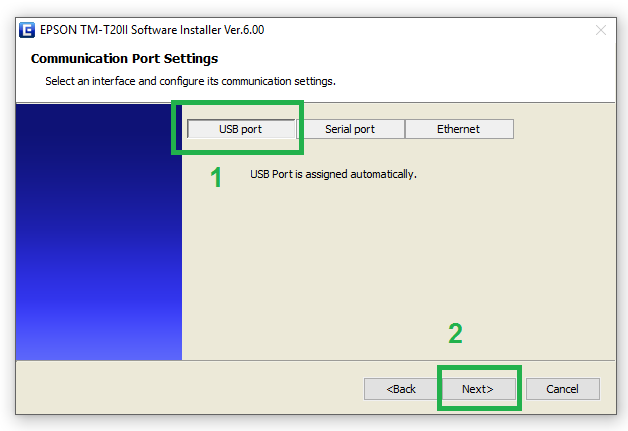
On the above screen select the USB port button and click Next.
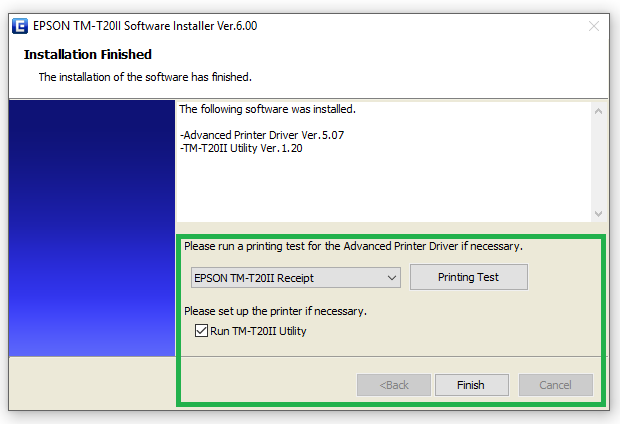
Ensure that the next screen matches the above picture, check the box to Run the TM-T20II Utility and click Finish.
The Epson TM-T20II is now installed and ready to use!
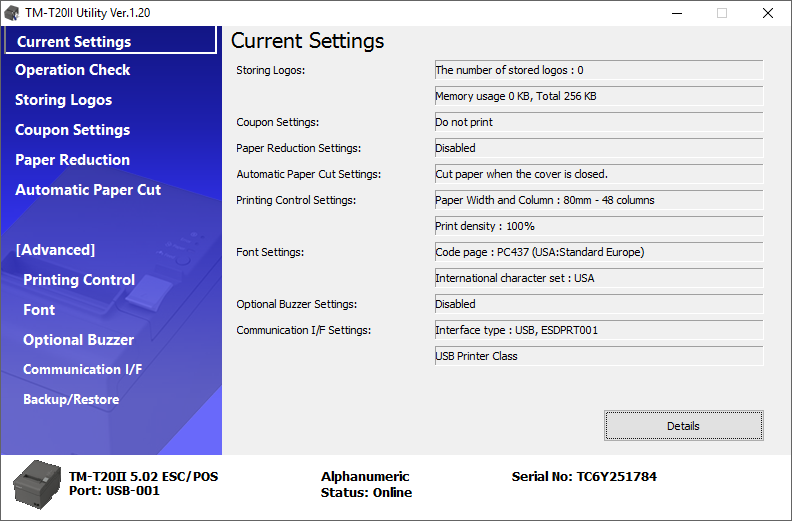
After the installation, the TM-T20II Utility will run and allow you to change certain printer defaults if necessary.
Note : Frazer only supports receipt printing to 3 1/8" (80mm) paper.
Click here to order the appropriate size of receipt paper.
Once you're certain you have the correct receipt paper, set your Epson receipt printer up so that it
prints to the correct size paper.
First, select “Printing Control” in the Epson printer software
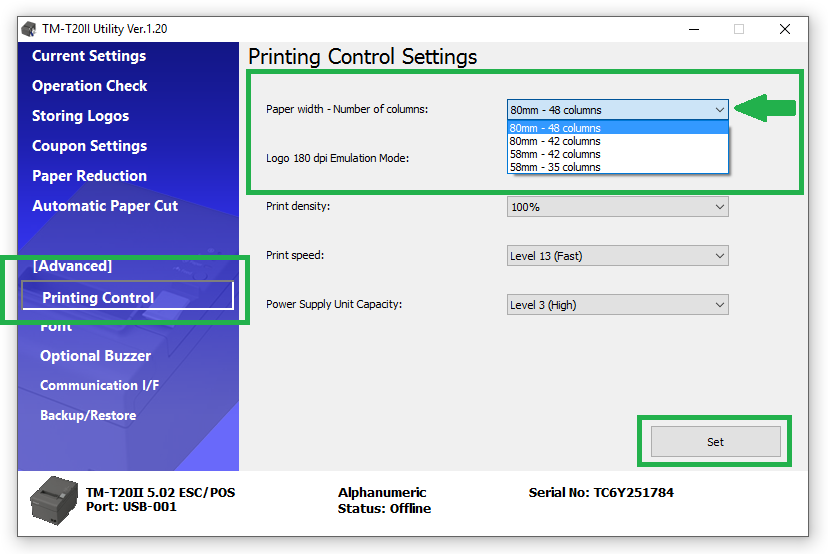
Then, Click on the dropdown “Paper width – Number of columns” and be sure that “80mm – 48 columns” is selected.
Then click “Set” to save the settings.
Your Epson receipt printer should be ready to print correctly!
Now, test the newly installed receipt printer out.
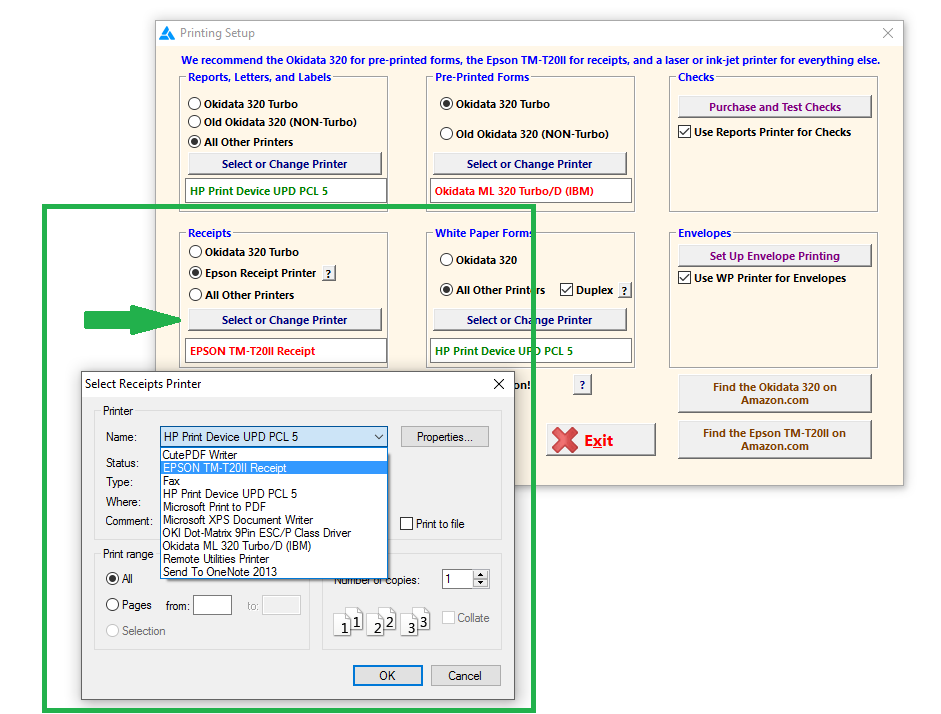
To select the Epson receipt printer in Frazer, click Miscellaneous at the top of Frazer → then click 0. Printer Setup.
In the Receipts printer box only (the bottom-left printer selection), click Select or Change Printer, then use the dropdown
to select the Epson TM-T20II receipt printer.
IMPORTANT : Don’t forget to select the bubble indicated below.
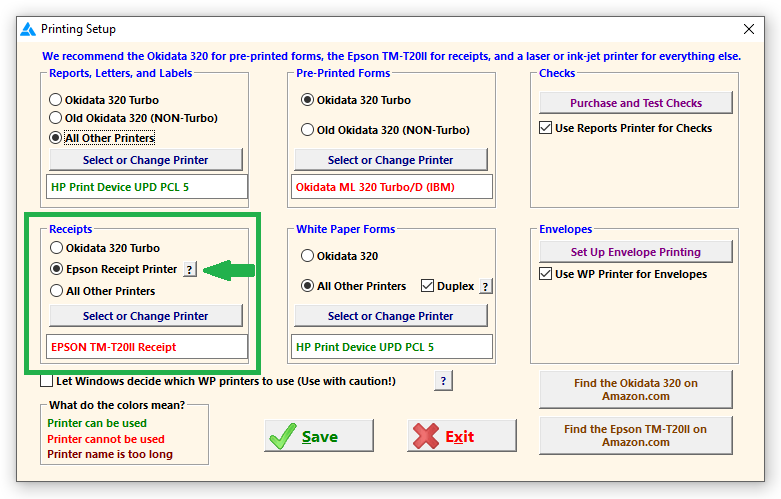
Once you complete these steps, Frazer will know that you’re using the Epson TM-T2011 receipt printer, specifically.
Click Save!
The Last Step is to ensure that you have told Frazer to use its new Advanced Receipt options to print your receipts.
To do so, Click Miscellaneous at the top of Frazer and then 1. System Options.
Switch to Tab 4. Payment Options.
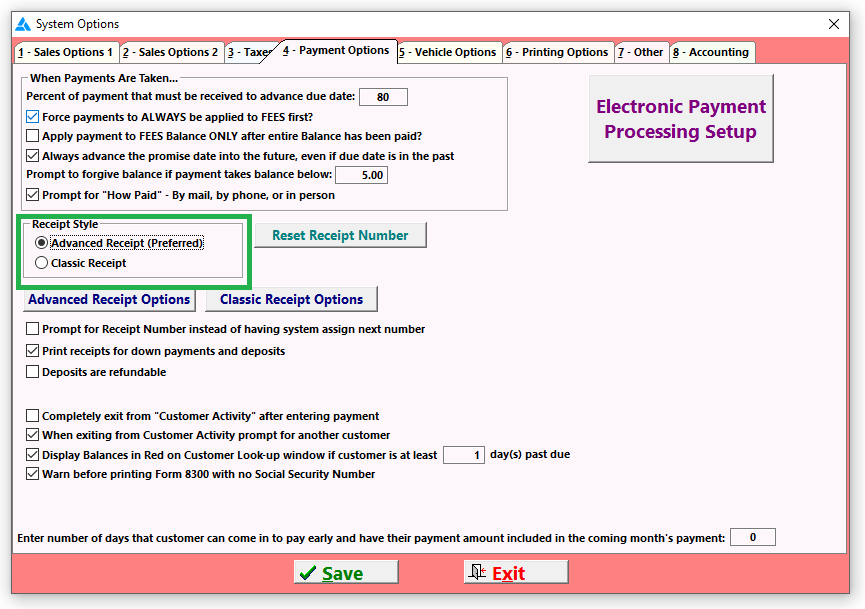
Be sure that "Advanced Receipt (Preferred) is selected in the above area and click "Save" at the bottom.
From here, you can test the receipt printer by reprinting any customer’s most recent payment receipt!